Is your family outgrowing your home? There comes a time for many people that the space available just isn’t enough. Two solutions present themselves in this situation; either move house or extend the one in which you live. Extending sideways may not be an option if you have no land around your property. If you have no cellar or basement, extending downwards is ruled out. So, as they say, the only way is up!
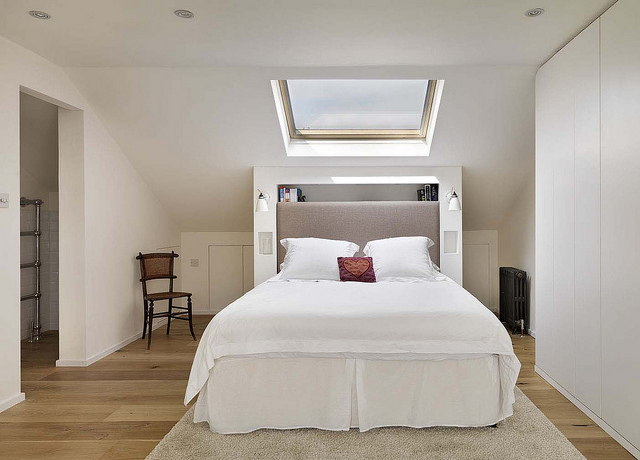
If you are lucky enough to own a house with a large roof space, stunning results can be achieved with a loft conversion. The loft often covers the entire footprint of the house so there may be space up there for two or more rooms. Since it is at the top of the building, there will be no pumping system needed for drainage from a bathroom.
We will take a look here, at the process of converting your loft. The only assumption made is that the floor beams are a suitable size and strength for the job.
It is always advisable before beginning any of this work, to ensure that it will meet the local planning regulations and, more importantly, the fire codes.
Windows
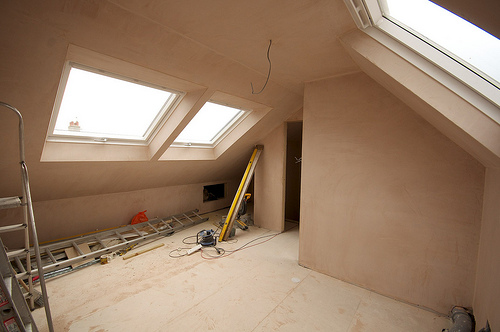
There are some wonderful, easy to fit windows available for the sloping roof. The first job is to get some light into your loft. If you are not confident on ladders, call a builder in for this job. It is not complicated but is a little precarious.
Access
Suitable access will have to be arranged as a priority The existing loft hatch can be converted to one of the new insulated drop down loft panels that are available. This can be used in conjunction with a pull down ladder. Alternatively, you may decide on a more permanent solution such as a staircase.
First Fix
The first fix is the process where electricians and plumbers install the main pipework and cables. This must be done before the floor is laid. When the frames for dividing walls are built, there may be more first fix work required.
Insulation
Insulation will need to be laid between the joists and roof beams. Use insulating board between the beams that easily cut with a saw and wedged in place.
Floor
The floor can now be installed. Tongue and groove chipboard panels are well suited to this job.
Walls
After the floor is complete, the internal walls can be constructed. Once the frames are in place, recall the plumbers and electricians if needed.
Plaster
Your plasterers can now set to work boarding the loft and skimming it with the finish coat. By now your loft is really taking shape.
It will only take a day for the plaster to dry enough for you to continue with the project.
Second Fix
Second fix is the process where the tradesmen come back to install all of the fixtures and fittings such as lighting, power, and bathroom fittings. Trimmings are also installed, such as skirting boards and architraves.
Within a matter of weeks, your loft conversion project could be complete. It is now a usable space that has added value to your home with relatively little disruption. It may well be a self contained apartment that the children will fight over the right to move in.
Images by flickr.
http://www.flickr.com/photos/84063900@N02/7697174534/sizes/z/
www.flickr.com/photos/martin_thomas/7047923769/sizes/m/
2 Smart Readers SAID::
This is very good idea in converting your loft, if your house's big enough and wide space for the ceiling. You can plan ahead with the construction and decors in advance together with the carpenter.
A loft type room would also be a comfortable one.
Post a Comment
Thanks for leaving your thoughts!